Features
1. Equipped with a high-quality audio decoder chip.
2. Supports MP3 and WAV audio files.
3. Along with a PIR sensor, and the detection distance is up to 6 meters.
4. Built-in a 8MB flash memory, which is able to store total of about 8 minutes long MP3 files of 128Kbps.
5. Equipped with a micro-SD card holder and supports max. 32GB micro-SD card.
6. Solder pads for connection with external USB flash drive available on the back of the board.
7. Update audio files easily through the micro-USB port connected with PC like using a USB drive.
8. Built-in a class D 15Watts amplifier IC that is possible to drive a 10Watts 8ohms or 15Watts 8ohms speaker.
9. Equipped with a female stereo 3.5mm audio jack that can be connected to an external amplifier or powered speaker.
10. Adjustable sound volume through the blue potentiometer.
11. Optional to play a sound in order or in random after each activation when there are multiple files in the memory.
12. When a sound is playing, there is a load output simultaneously, which can directly drive a warning light, LED light or LED strip.
13. A busy output available as well. It outputs high level when playing and low level when standby.
14. Great sound quality and stable performance.
15. PCB size: 45 x 45mm
16. Length of the wires from PIR sensor V1: 20cm
17. Length of the cable from PIR sensor V2: 45cm
18. Dimensions of PIR sensor V2: 52 x 36 x 23mm
19. Length of the wires from PIR sensor V3: 28cm
20. Length of the wires from the push button: 20cm
Technical Parameters
1. Working Voltage: 9-24V DC
2. Working Current: ≤2000mA
3. Consumption Current at Playback: ≤500mA (12V DC)
4. Standby Current: ≤10mA
5. Flash memory size: 8Mbytes
6. Audio format: MP3 or WAV
7. Detection Distance: ≤6 meters
8. Detection Angle: 120 degrees
Schematic of Wiring Connections
1. Connection with a PIR Motion Sensor

Note:
The load output ports have the exactly same voltage as the power supply you use, so if you need to connect with a 12V light, the power supply you need to use must be 12V. If you don’t need to connect with a light, just ignore this.
2. Connection with a Button or Switch

Note:
The load output ports have the exactly same voltage as the power supply you use, so if you need to connect with a 12V light, the power supply you need to use must be 12V. If you don’t need to connect with a light, just ignore this.
How to play a sound in a loop when power is applied to the module?
1). Jump the switch (bridge the terminal connector "GND" and "TG" with wire).
2). Create config file with number "3" in it. See the manual how to create a config file.
3). Apply power to the power input of the module.
4). The sound will play a in a loop (Where there`re multiple sound files, the unit will play them one after another in order and then loop).
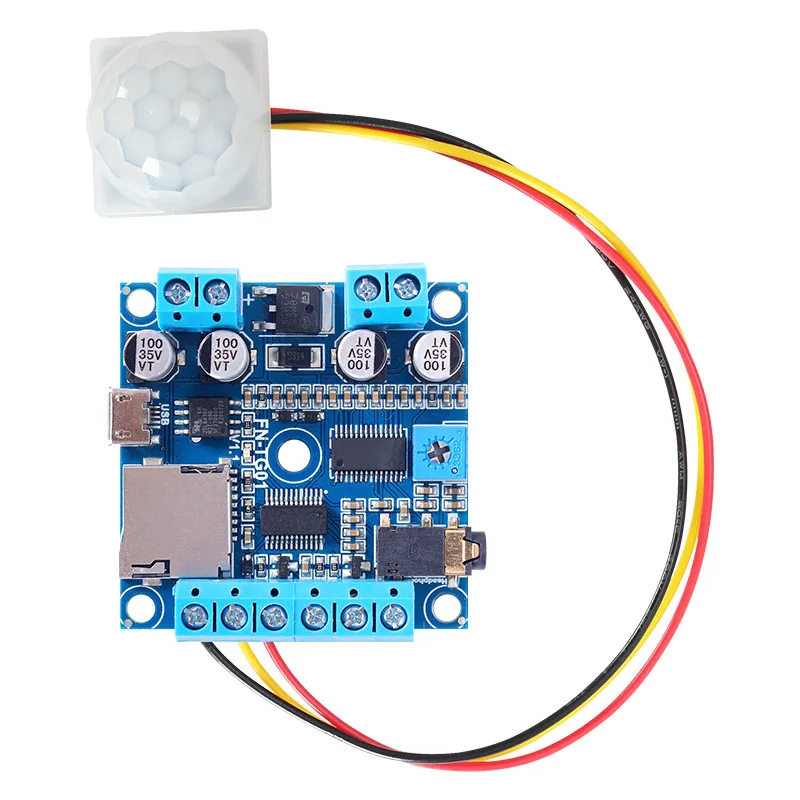
With PIR Sensor V1

With PIR Sensor V2
With PIR Sensor V3
With a Self-reset Push Button

Speaker and LED light bar shown in the video is NOT included!!!


 배송기간
배송기간